Videos
Watch videos from Wood’s Powr-Grip to learn more about vacuum lifting equipment, handheld vacuum cups, mounting cups, replacement parts, product features, and maintenance procedures. Our video library includes demonstrations, instructional resources, repair guidance, product comparisons, company history, and information about technologies such as Intelli-Grip®, which helps monitor vacuum lifter performance through connected mobile app data.
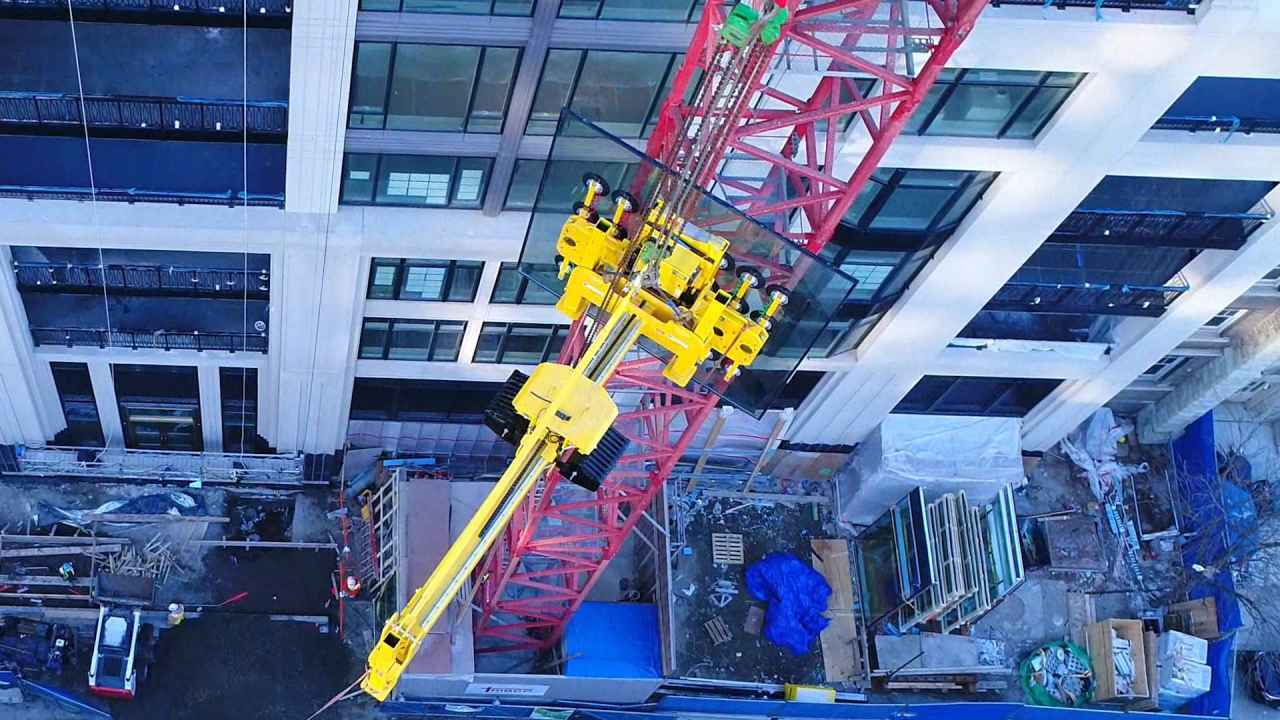
WPG Lifters See Action at Chicago’s Walton Tower
Wood’s Powr-Grip® lifters go to work placing glass for the top five stories of the luxurious Walton No. 9 Tower. The WPG Lifters PRT32 and CB4DCS were used in combination for glass lifting and placement. Visit http://wpg.com to learn more. Footage courtesy of: Ventana Design-Build Systems

Connecting the Pad Frame
The video demonstrates connecting the pad frame to the equipment. Locking pins and shafts are removed from the pad frame connecting brackets, vacuum hoses are connected at the manipulating head, and the shafts and locking pins are reinstalled. Bolts on the pad frame connecting brackets are tightened to complete the connection. The video also shows a steering control and directional movements during the process.

Disconnecting the Pad Frame
Read and understand the equipment manual before use. Position the parking stands to provide stable support. Disconnect the vacuum hoses at the manipulating head. Loosen the bolts on the pad frame connecting brackets, then remove the locking pins and shafts completely. Secure the pad frame to the parking stands using straps.

Setting Up the CB4 Lifting System
Read and understand the equipment manual before use. Attach the lift point to the crane’s hoisting hook. A tag line may be attached for added control if desired. Once the system is hoisted to a suitable distance from the ground, retract all parking legs. The video demonstrates general handling and positioning of the system during setup.

Attaching/Sealing the Pads to a Load
Read and understand the equipment manual before use. Review the adjustable telescoping pad shafts procedure prior to attaching the load. Ensure all pad shutoff valves are in the OFF position, then press the Attach button as shown in the video. The video demonstrates when pad valves are turned to the ON position to create vacuum between the pads and the load. Press the pad adjustment button and move the shaft until the pad makes contact with the load. Turn the pad valve to ON to create vacuum and begin sealing. Continue pressing the pad adjustment button until the pad is fully seated against the load. Use the pad adjustment knob for fine adjustments until the pad adjustment button releases. Once all pads are attached, verify that the green lift light is illuminated, indicating sufficient vacuum for lifting. A strobe light indicates a vacuum leak.

Releasing the Pads from the Load
Read and understand the equipment manual before use. This video demonstrates releasing the pads from the load using the radio transmitter. The pads are released by pressing and holding the buttons as shown on the transmitter, including the button labeled Release and the FN button. Always follow manufacturer instructions when operating the controls.

Rotating and Tilting
Read and understand the equipment manual before use. This video demonstrates the rotation and tilt functions using the machine controls. Only one motion, either rotation or tilt, should be operated at a time. Control inputs shown are for demonstration purposes; always follow manufacturer instructions for safe operation.

Moving the Counterweight
Read and understand the equipment manual before use. This video demonstrates the rotation and tilt functions using the machine controls. Only one motion, either rotation or tilt, should be operated at a time. Control inputs shown are for demonstration purposes; always follow manufacturer instructions for safe operation.

Mounting Manipulator to Forklift
Read and understand the entire instruction manual before use. The manipulator is positioned flush against the back of the forklift carriage and lifted a minimal distance off the ground. Fork-securing bolts are tightened to hold the manipulator in place. The manipulator is then secured to the forklift carriage using ratchet straps on the left and right sides. Each strap is attached to the top ratchet strap mount, routed over the back of the forklift carriage, and connected to the bottom ratchet strap mount. The straps are ratcheted until taut to complete the installation.